- Documentation
- Manage Organization
Documentation Quick Links
Manage Organization
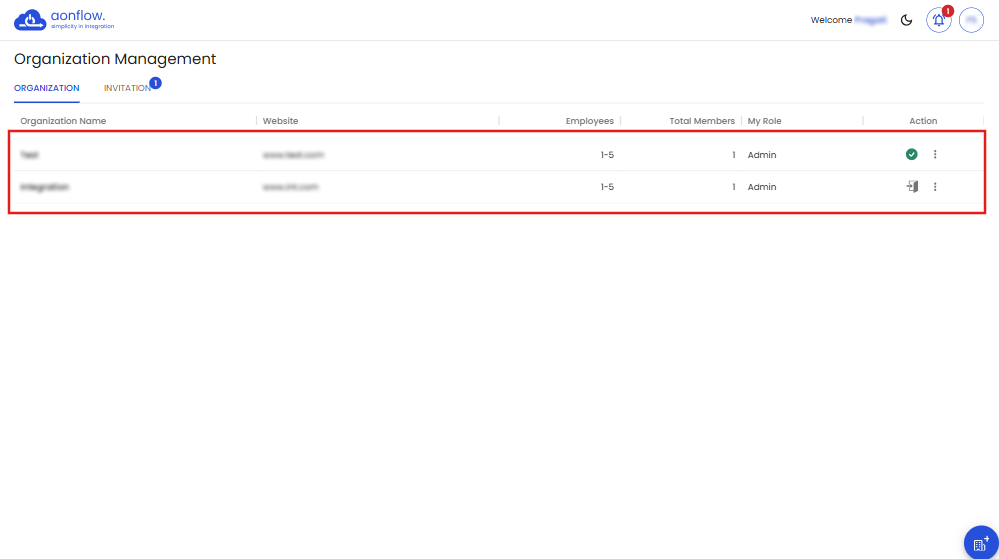
On the organizations page, you can view the list of organizations that you are a part of and their details.
Follow the following steps to access the organizations page.
-
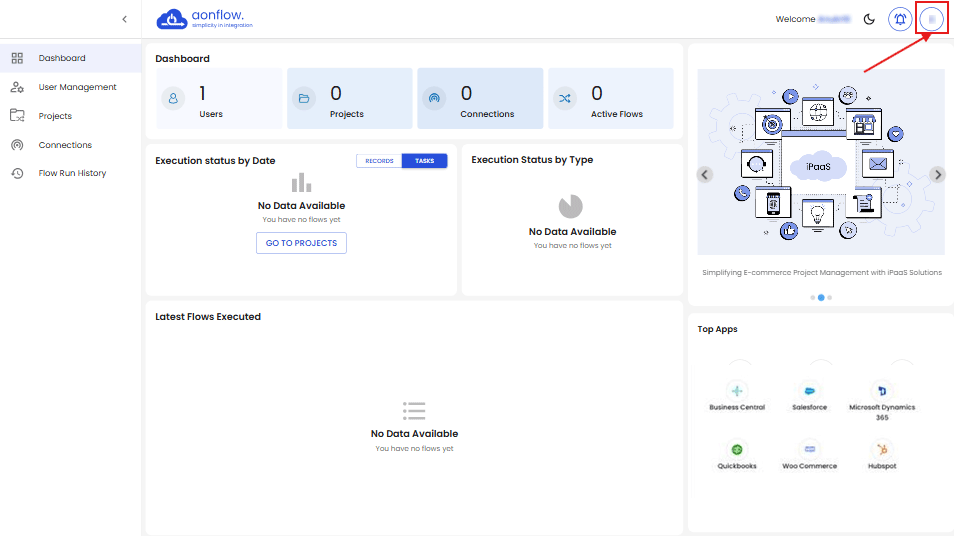
Click on the user icon next to the ‘bell icon’ (as seen in the image below).
-
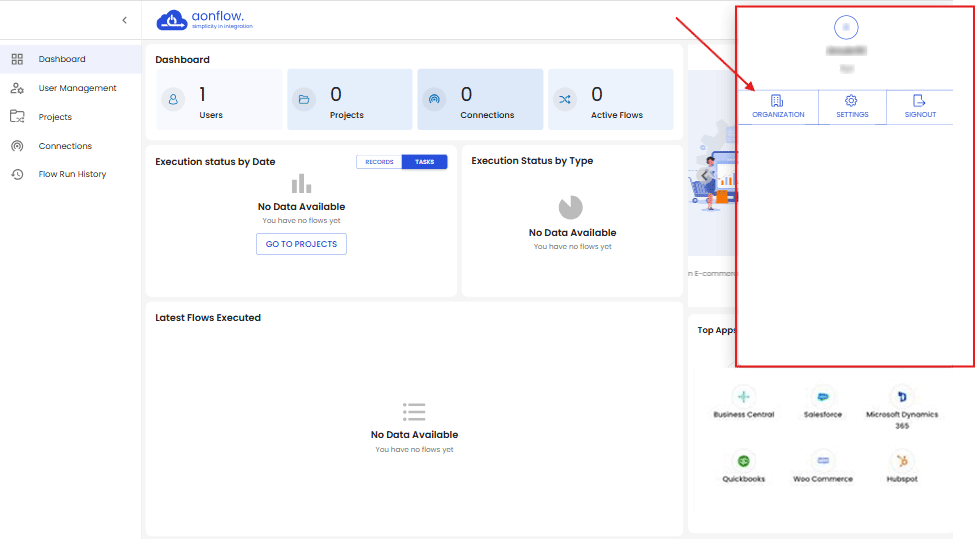
The dropdown to the right will appear (as seen in the image below).
-
Click on ‘ORGANIZATION’.
-
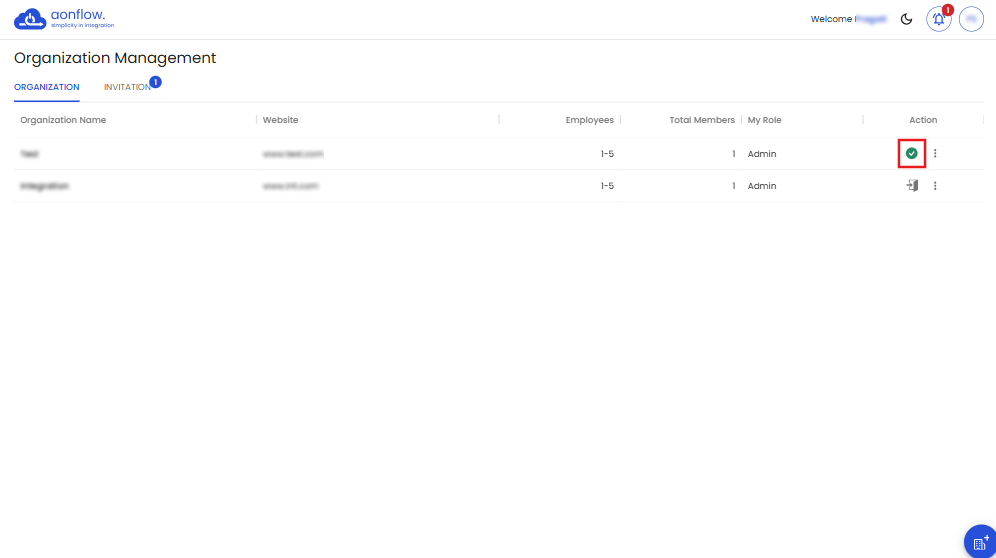
Here you can view the list of organizations that you are part of and their details; the organization name, organization’s website URL, no. of employees in the organization, total members in the organization, your role in the organization.
-
You also have the option to Switch Organization, from the current one. Under the ‘Action’ column, you will notice an exit door icon. Click on it to switch to another Organization.
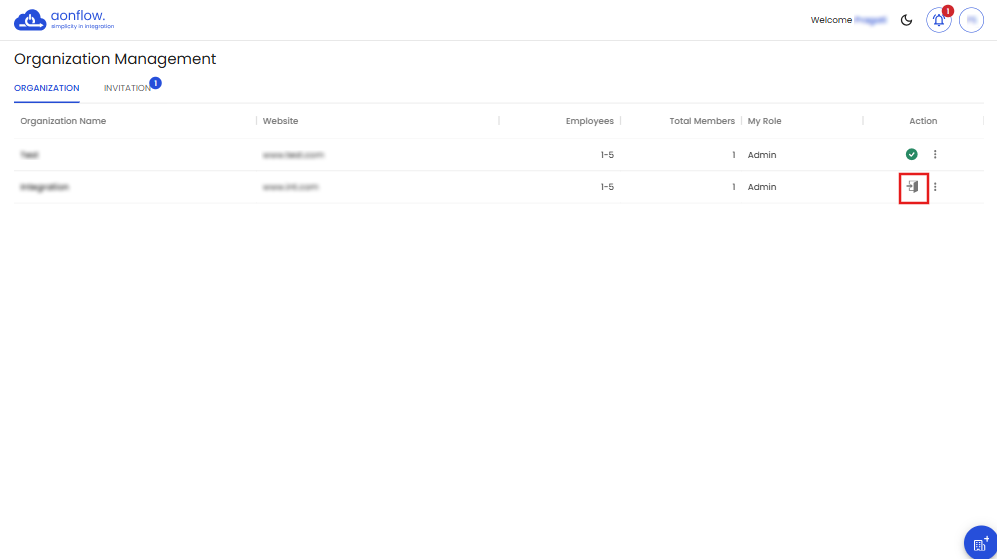
Green tick next to the options indicates that your organization is active.
-
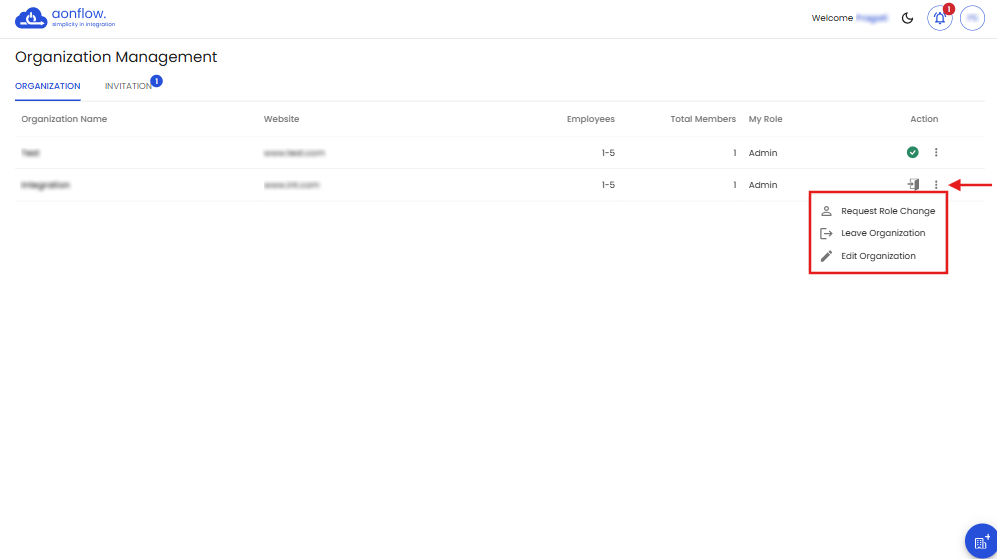
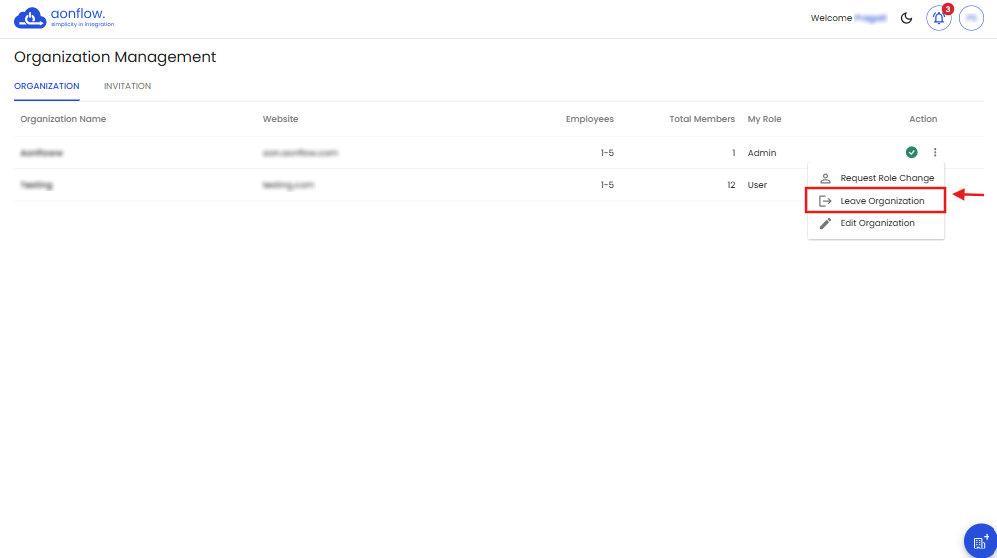
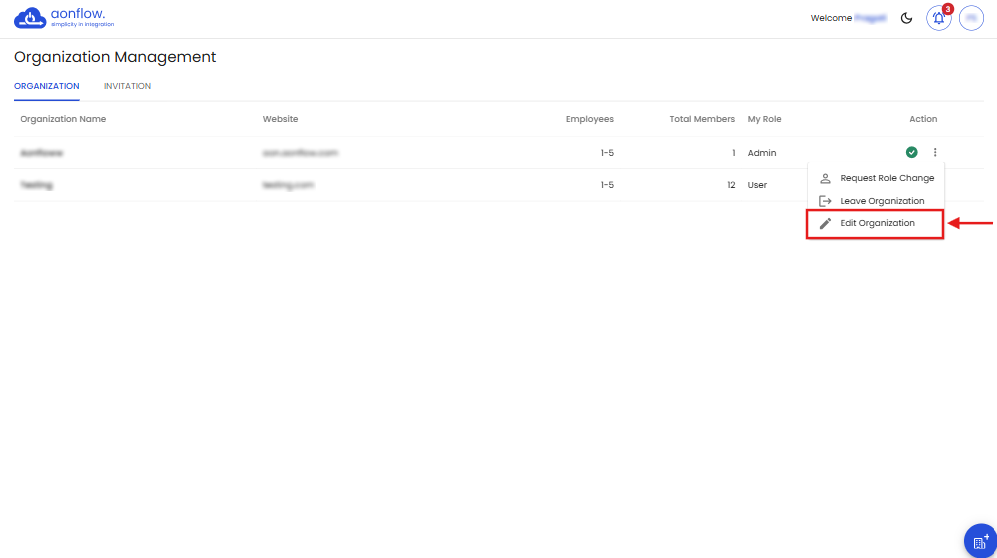
Click on the three dots to view the options such as Request Role Change, Leave organization & Edit Organization.
-
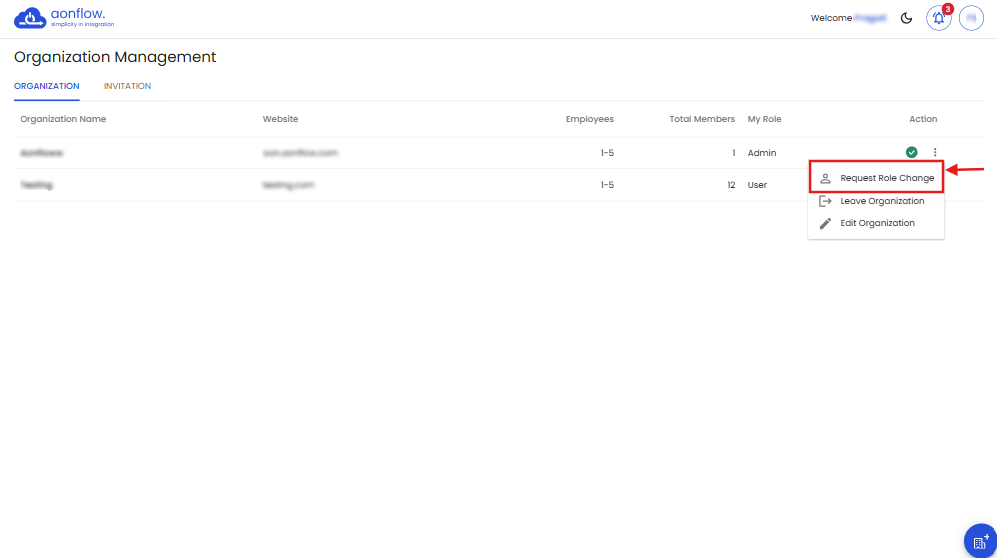
Click on Request Role change.
-
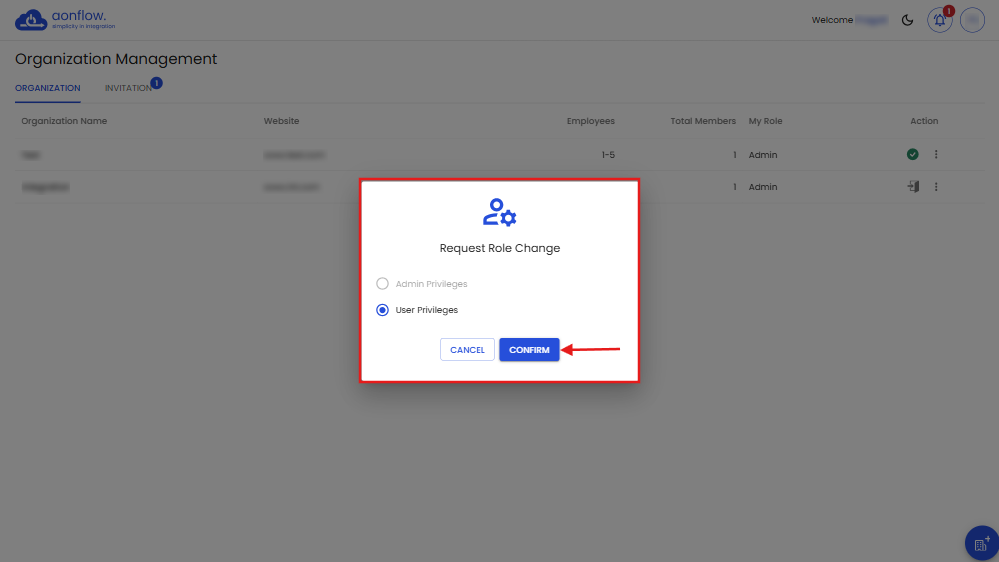
Request Role change pop up appears where the role is already chosen. Click on Confirm.
-
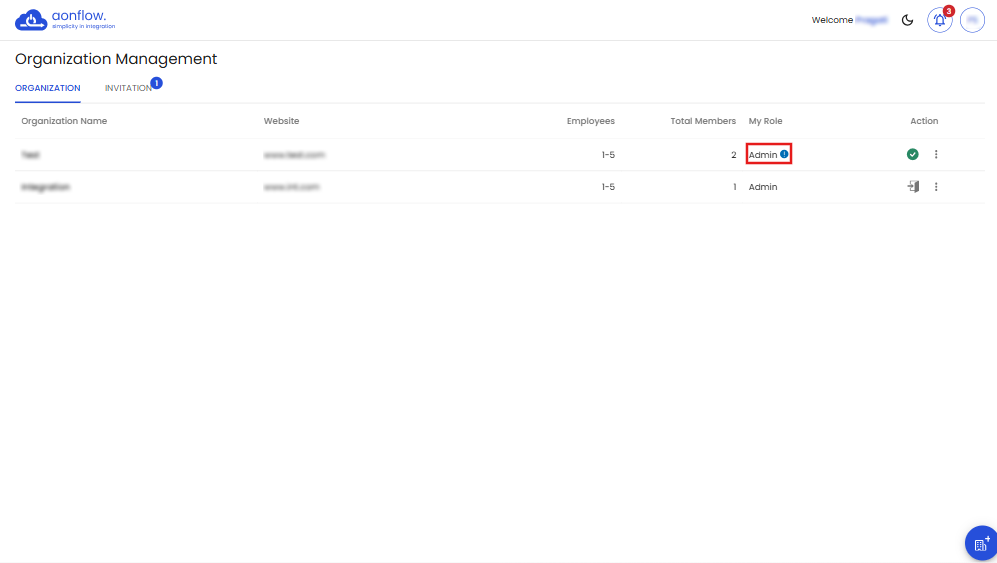
You can see an indication on top of your present role, that your request has been raised.
-
Click on the Leave organization, if you wish to leave an organization.
-
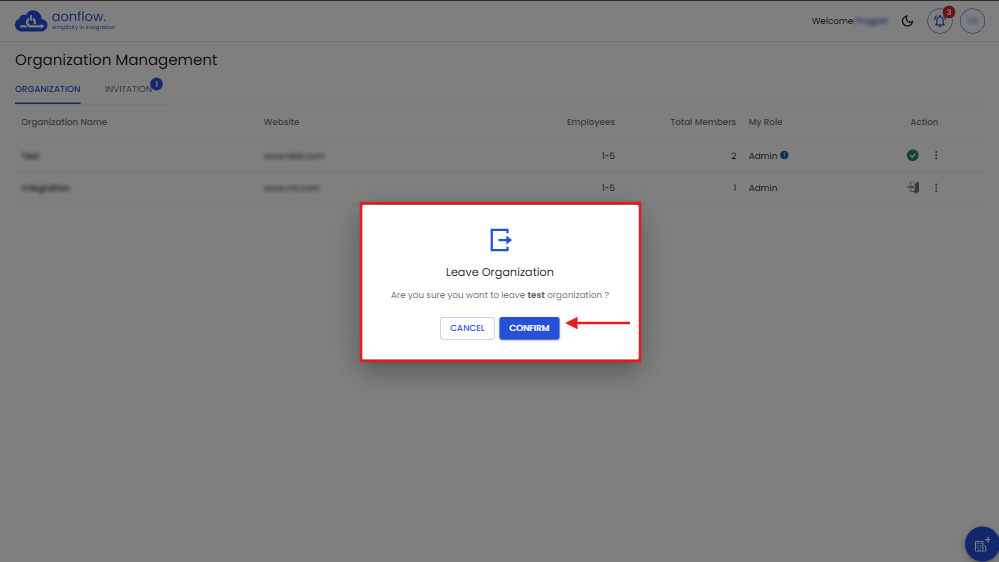
Leave organization pop-up appears.
-
Click on Confirm.
-
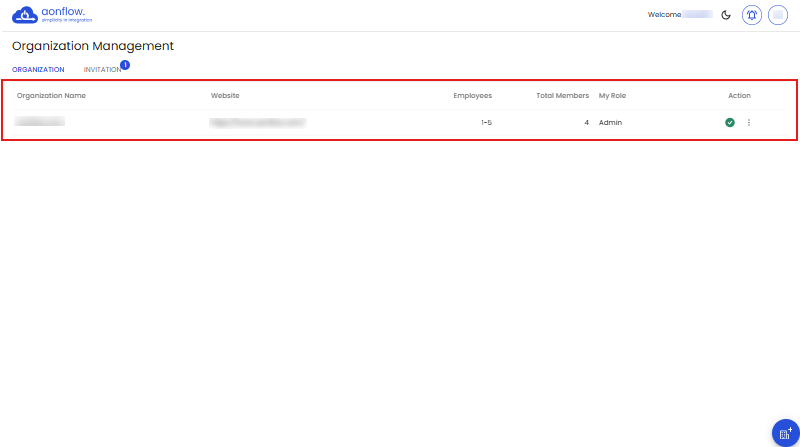
The organization gets removed from the list of organizations, as seen below.
-
Click on Edit Organization, to edit the organization details.
-
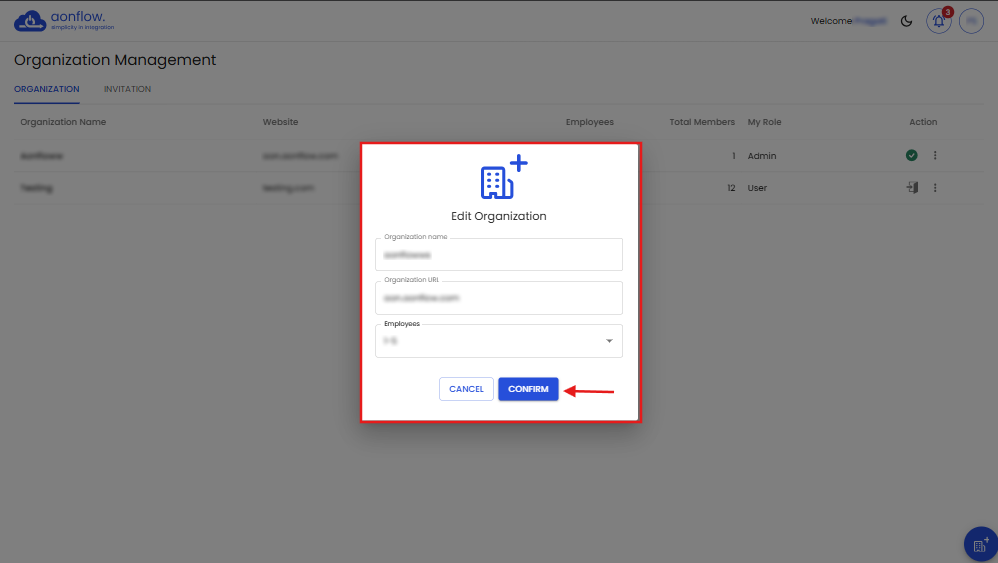
Edit the details you wish to update on the Edit organizations pop up, click on Confirm to save.
-
The changes are reflected on the organizations table.
-
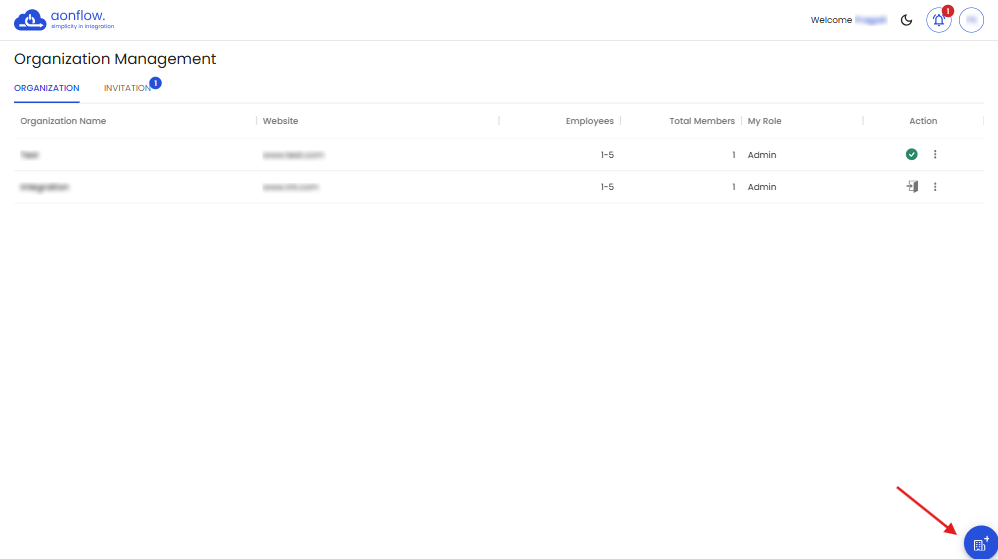
Click on the plus icon on the bottom right corner to Create a new organization.
-
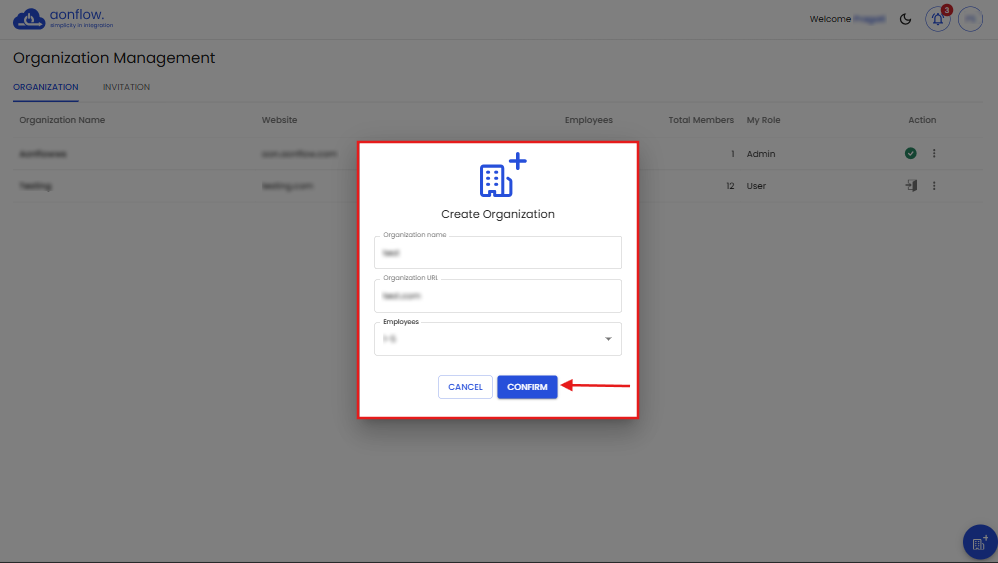
Create organization pop up appears.

-
Enter your organization name, website URL, and choose the number of employees from the list.
-
Then click on “CONFIRM” to save.
-
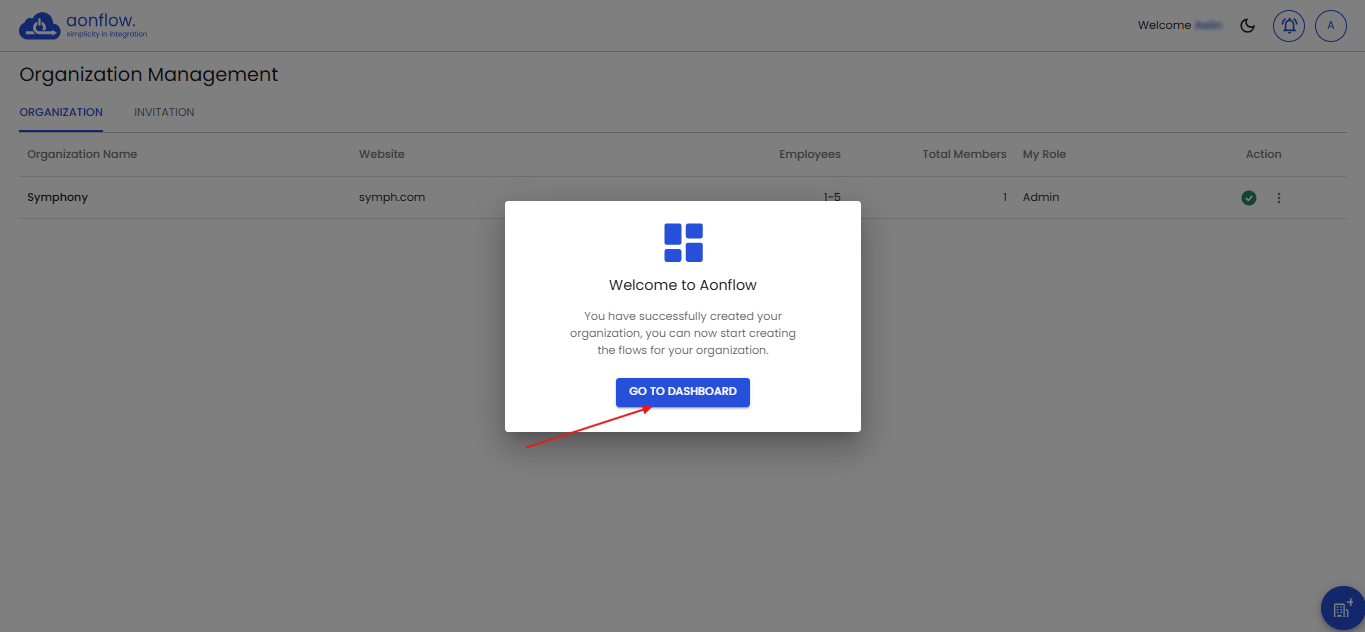
A welcome to Aonflow pop up appears, click on “GO TO DASHBOARD”.
-
You will be redirected to the main dashboard of Aonflow.

-
Navigate to the Organizations page following the steps 1, 2 and 3.
-
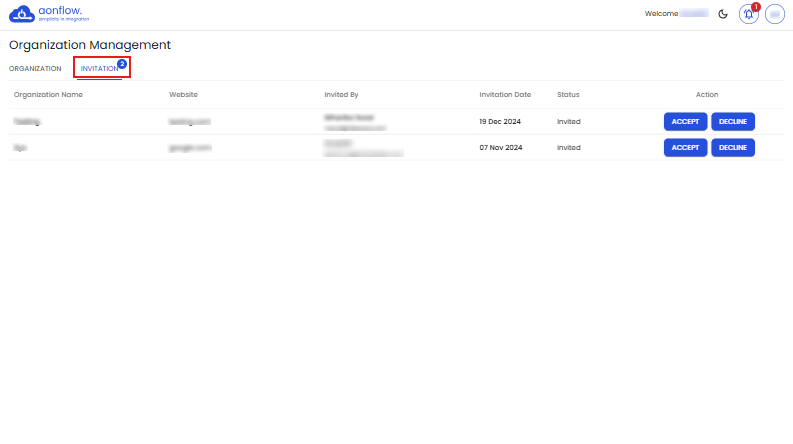
Click on the Invitations tab to view the invitations received to join other organizations.
-
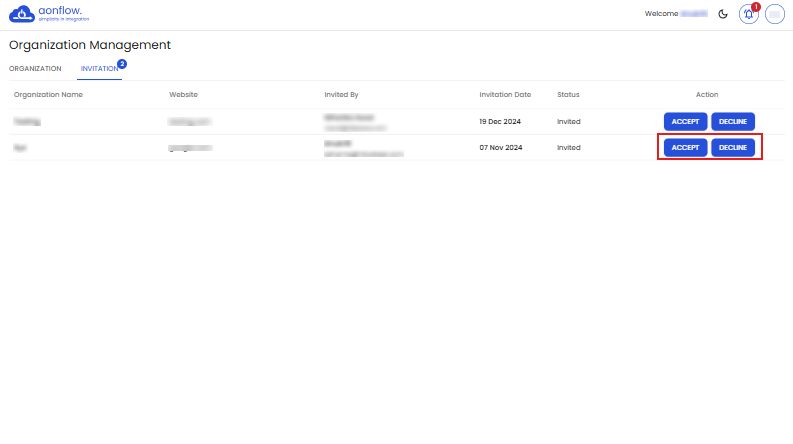
You can Accept or Decline the invitation by clicking on the respective action button.
-
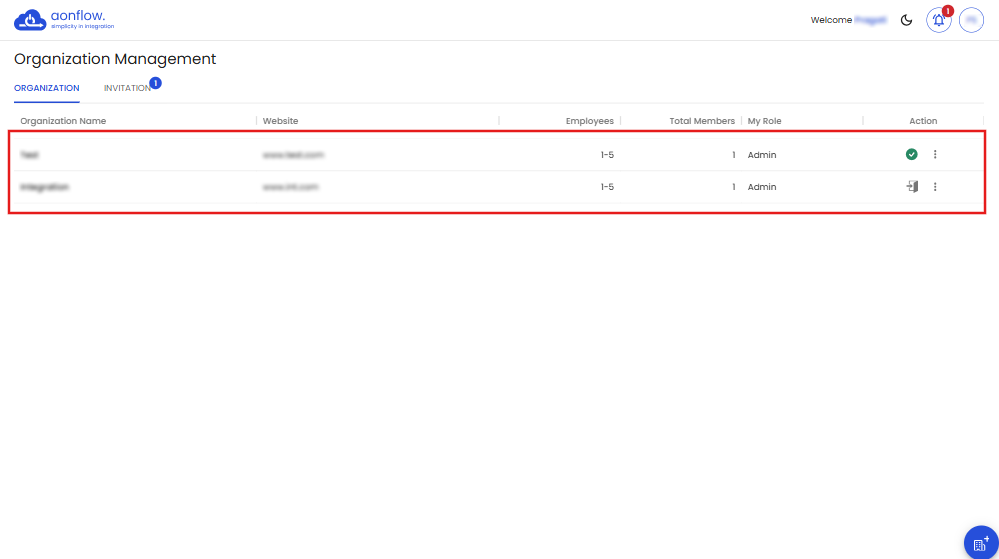
Once you accept the invitation, the organization gets added to the list of organizations and the details appear on your organizations page.
Note: You can create unlimited organizations depending on your requirement, in one account.