- Documentation
- Project Details
Documentation Quick Links
Project Details
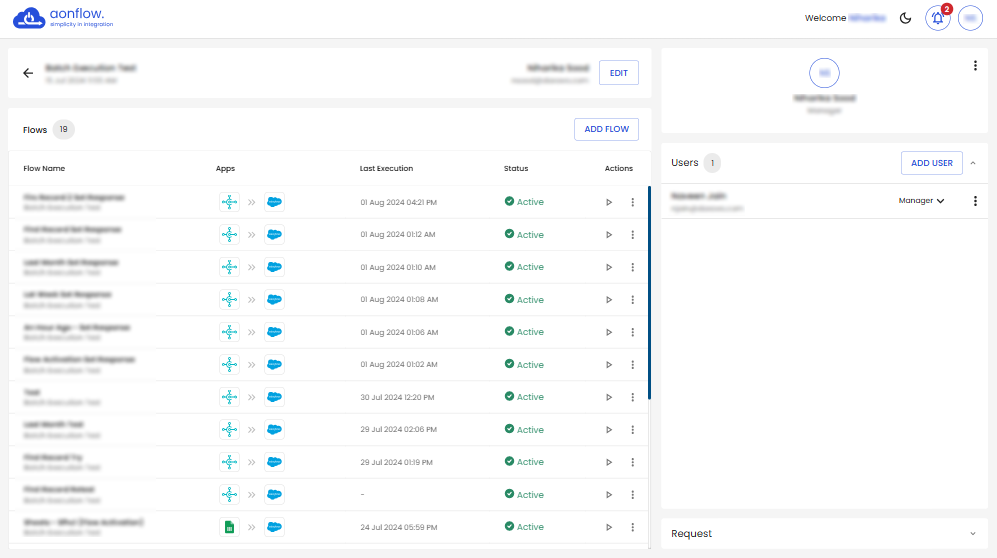
This is how the Project Details page looks like.
Here you can view the list of flows in the project and their details, list of users in the project and their details & can view the requests received in the project.
A. You can EDIT the project name.
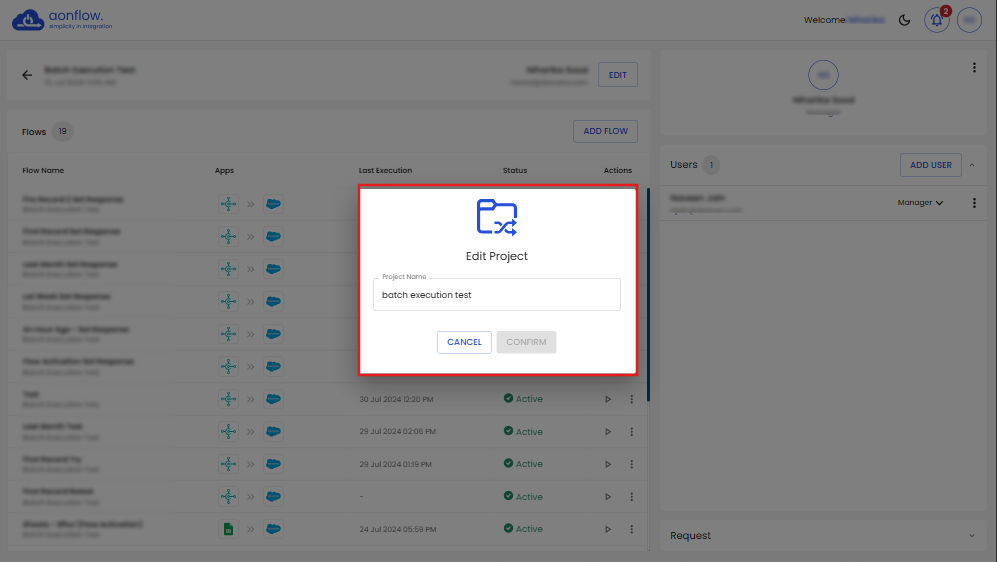
- Click on ‘EDIT’.
- Edit project pop-up appears.
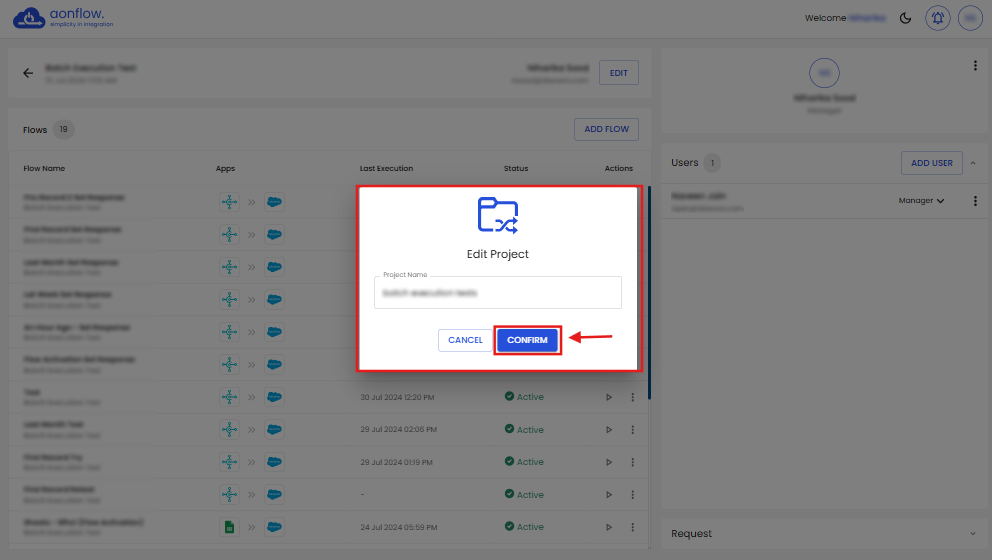
- Edit the name of the project.
- Click on the ‘CONFIRM’ button.
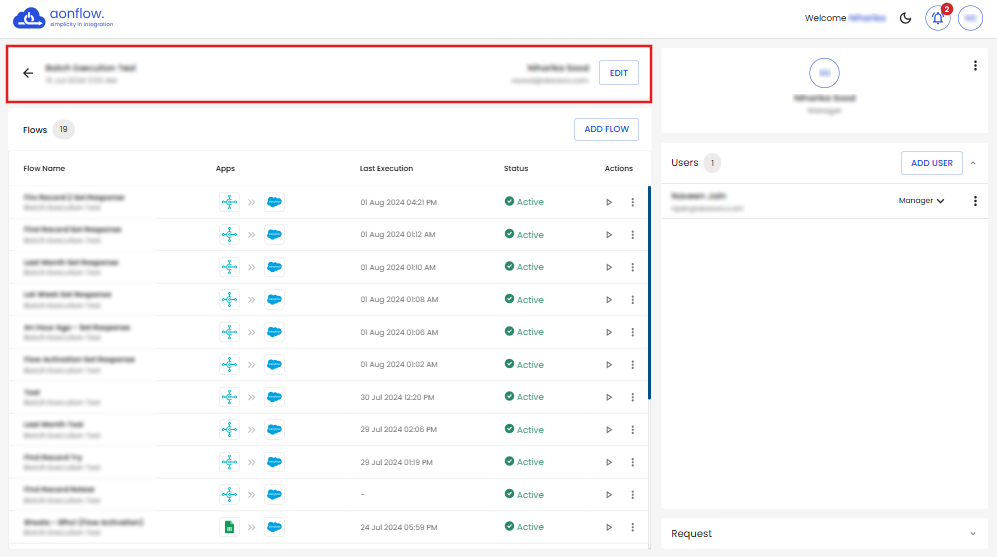
- Here is where you can view the edited project name.

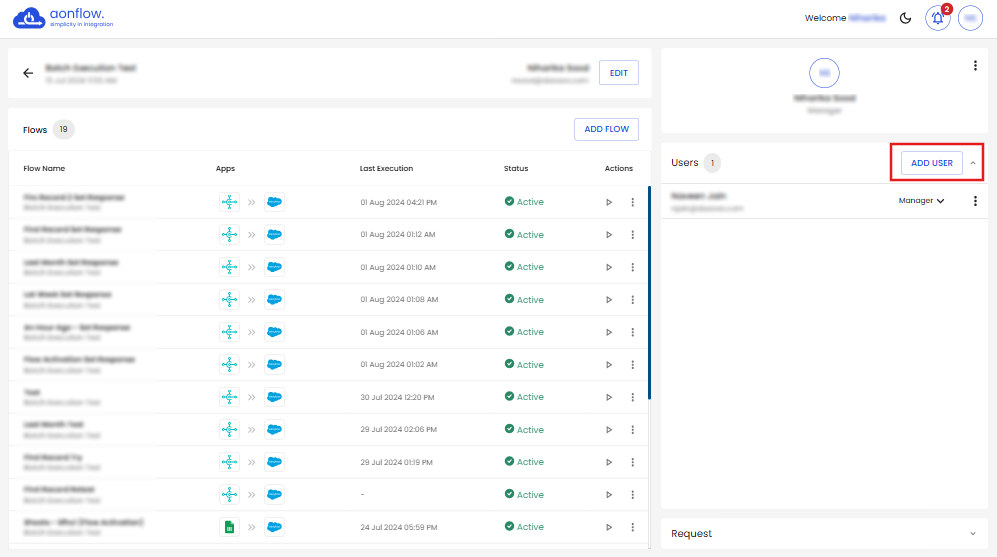
B. You can ADD USER to the project.
- Click on ADD USER in the Users section.
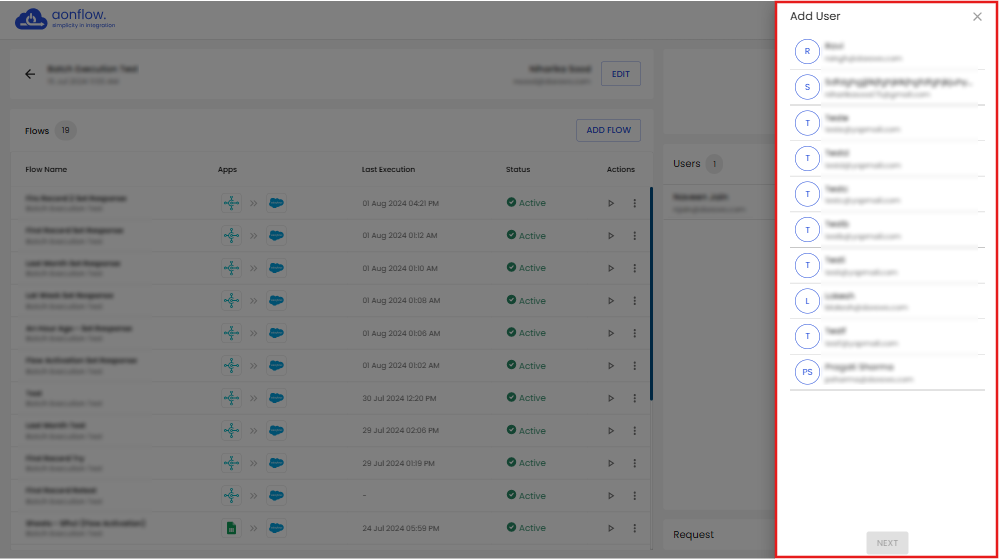
- Add User slider appears to the right, where you can view the list of users who are part of the organization.
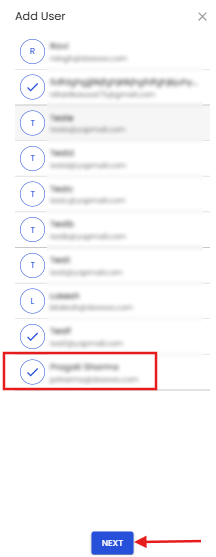
- Click on the email address of the user. Click on the ‘NEXT’ button.
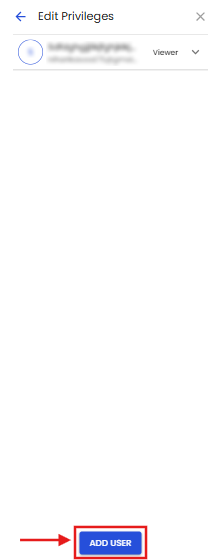
- You can choose the user privilege as per the role you want to assign to the user.
- Then click on the ‘ADD USER’ button on the bottom of the slider to add the user.

Note: You can also add multiple users to a project at once.
Manager Privilege: Can edit the project and flow, Can create new flows, execute the flows, add new users and change the existing users roles, remove users.
Editor Privilege: Can create new flows, Can edit the existing flows & execute the flows.
Viewer Privilege: Can view the flow and project details.
This is what the new user's details will look like in the users section on the project details page.
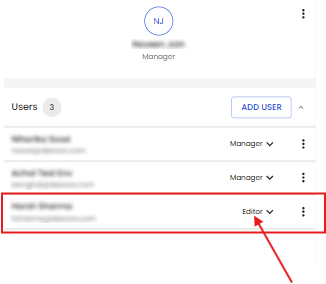
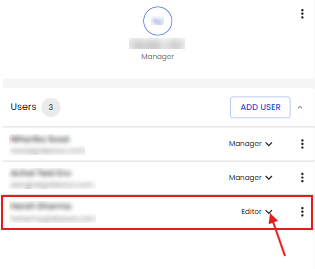
C. You can also edit the user’s privilege.
- Click on the Dropdown next to the user’s privilege in the Users section.
- Edit privilege slider appears, where you can choose the user’s privilege.
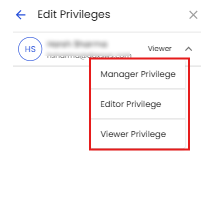
Let’s change the privilege to be Editor.
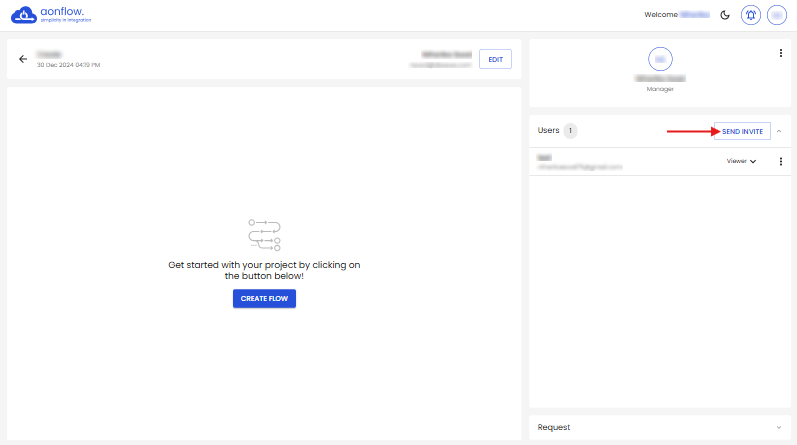
D. You can also invite new users to the organization from the project details page.
Note: If all the users of the organization have been added to the project then the Send Invite option appears on the top of Users section or no user’s exist in the organization then the Send Invite option appears in the middle of the users section.
- Click on the SEND INVITE button.
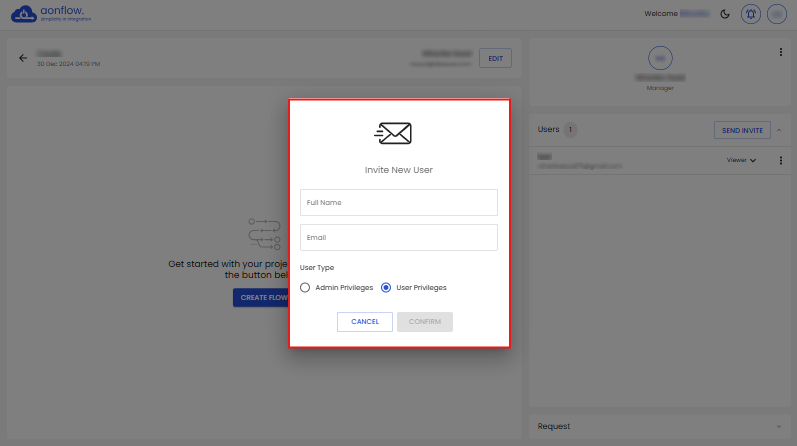
- Invite New User pop up appears.
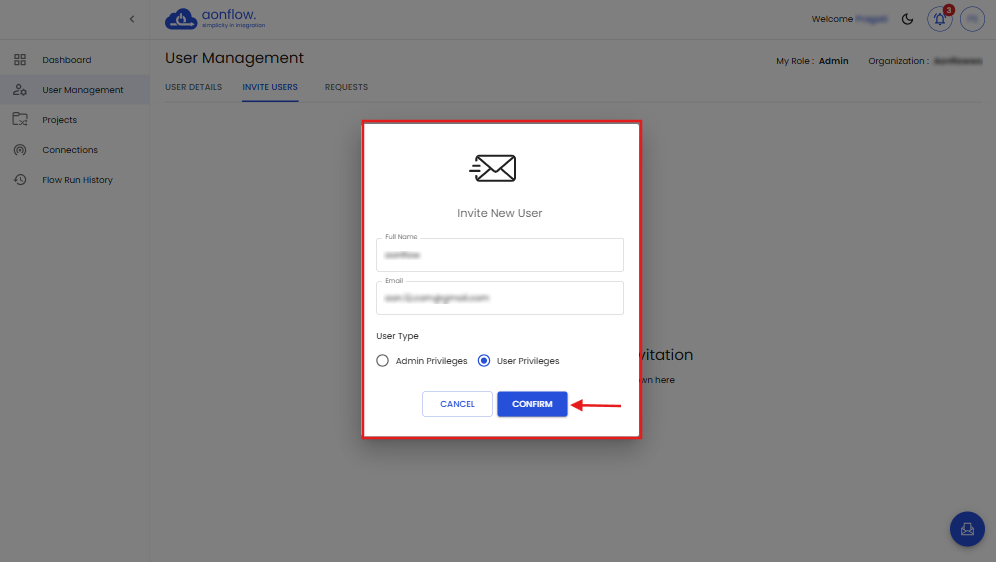
- Enter the credentials such as the Name and the email address of the user you want to invite.
- Choose the user’s privilege.
- Click on ‘CONFIRM’.
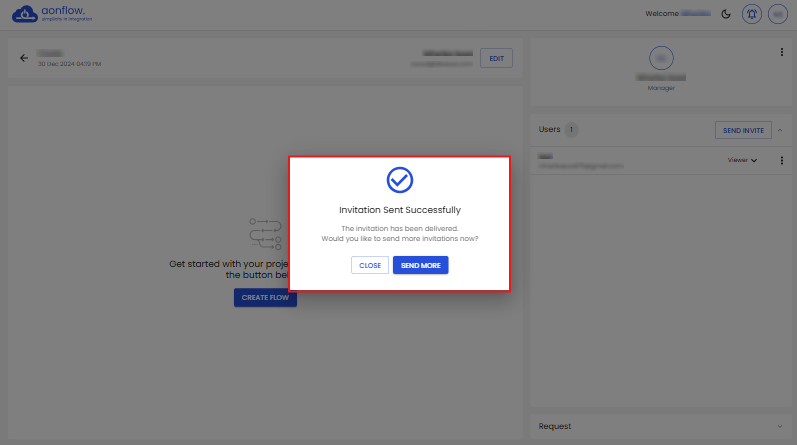
Invite Sent Successfully pop up appears.
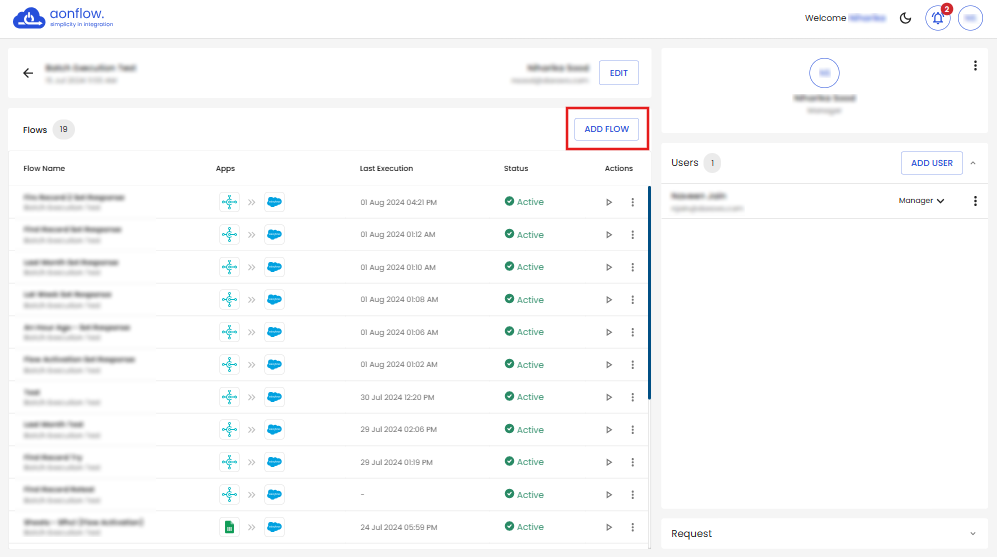
E. You can create a new flow from the project details page.
- Click on the ADD FLOW button.
- Click on the ‘CANCEL’ button.
- Cancel flow pop up appears, Click on ‘CONFIRM’ to cancel flow.
You get redirected to the new flows page.
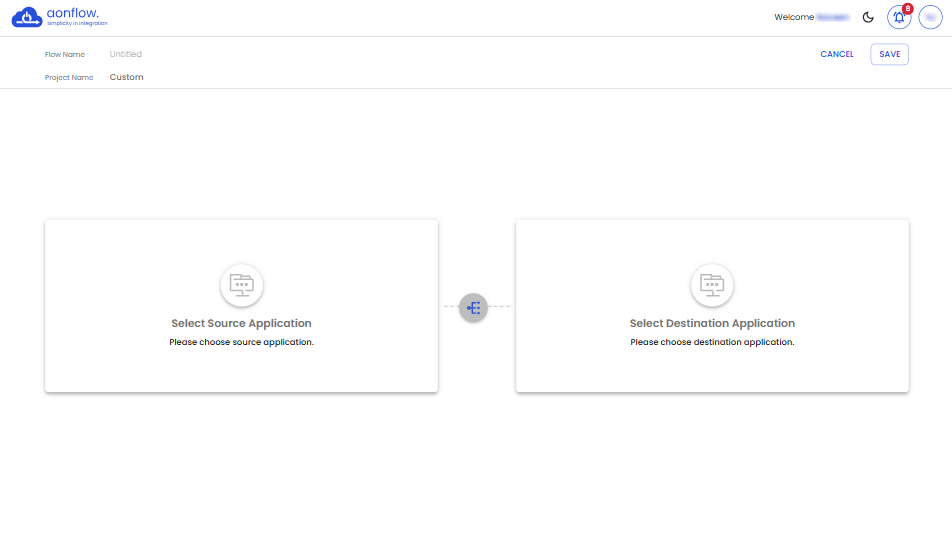
Since you are not creating a new flow;
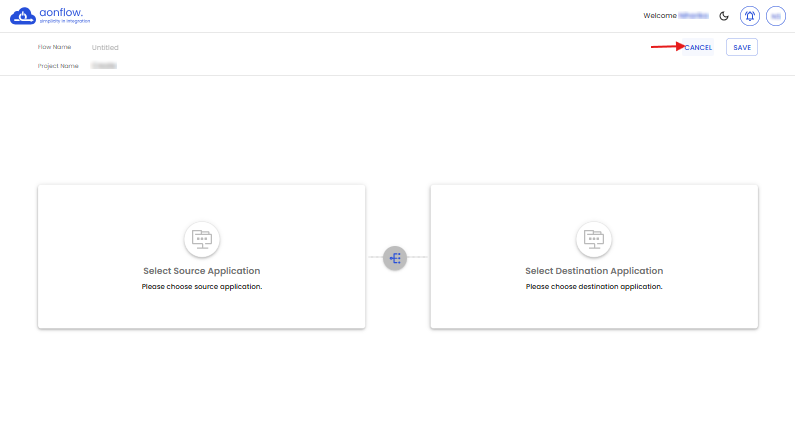
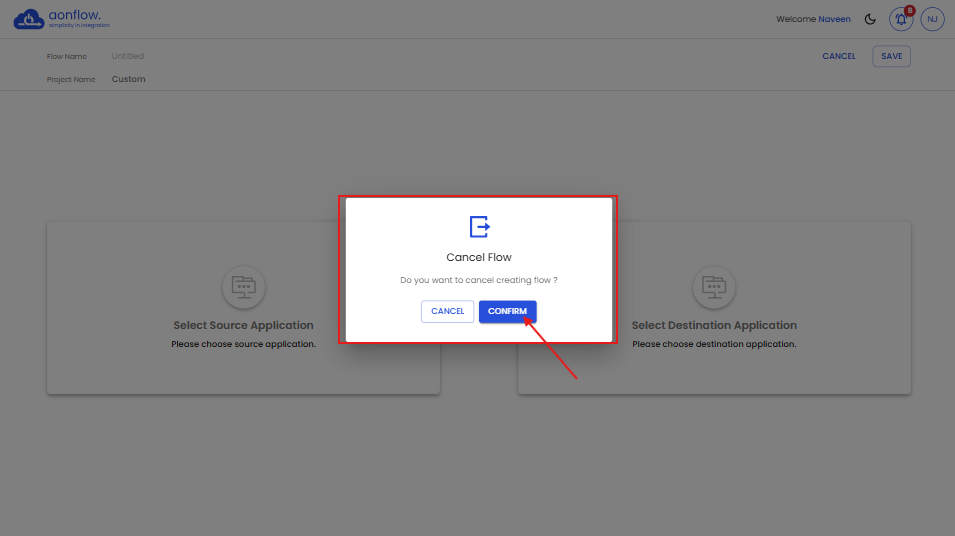
You will get redirected to the Projects details page.
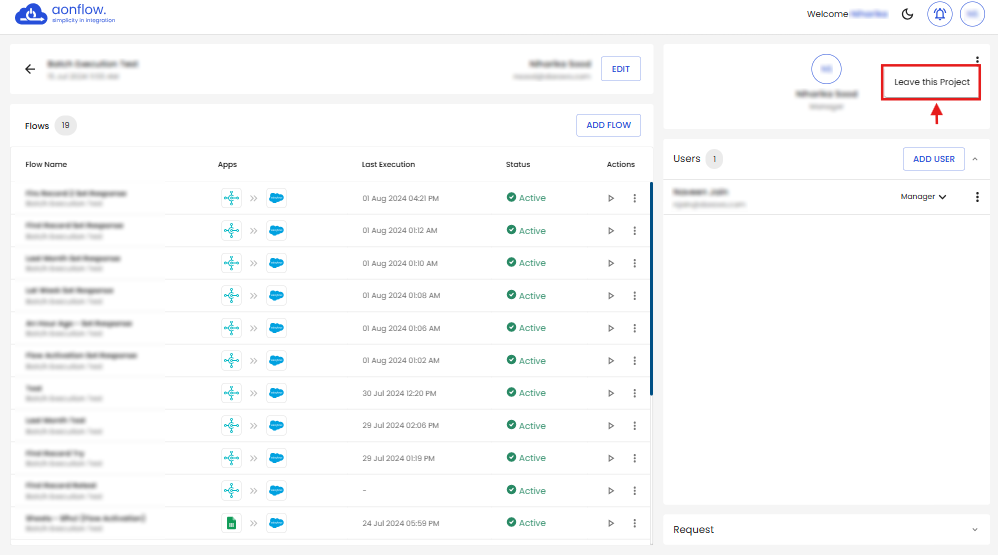
F. On the top right corner of the project details page, next to the Username, you will notice three dots.
- When you click on these three dots, a message appears - Leave this Project, If you are a manager.
- Since you are the only user in this scenario, if you click on the Leave this Project message, the project will get deleted.
- If you are a user of the project with viewer privilege you can also see the Request Edit privilege change option along with the leave project option.
- If you are a user of the project with editor privilege you can also see the Request Manager privilege change option along with the leave project option.
Click on Request Edit privilege.
Click on Request Manager privilege.
Next moving to the Requests Section.
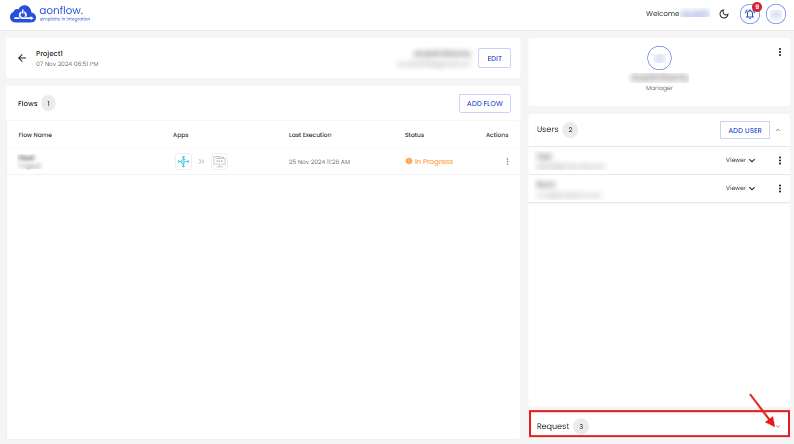
- Click on the drop-down arrow on the Request section towards the bottom right of the project details page.
- The list of join project & request privilege change requests are visible.
- Click on the tick icon to accept the request.
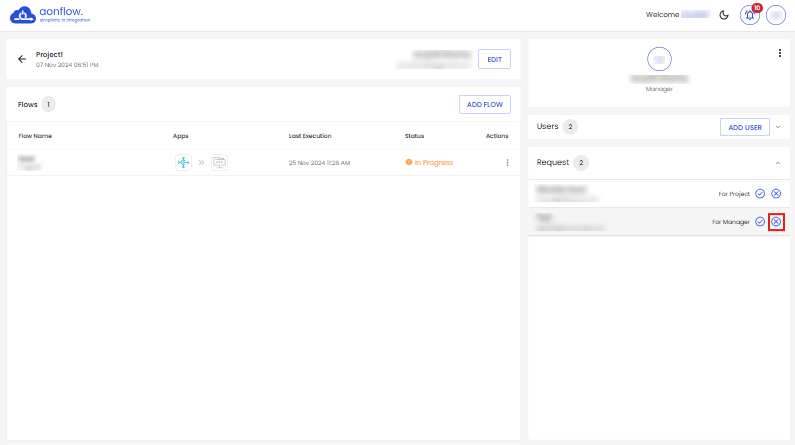
- Now click on the cross icon to decline the request.

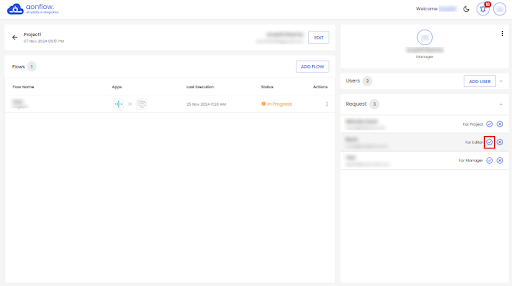
You can see that only 2 requests are pending.
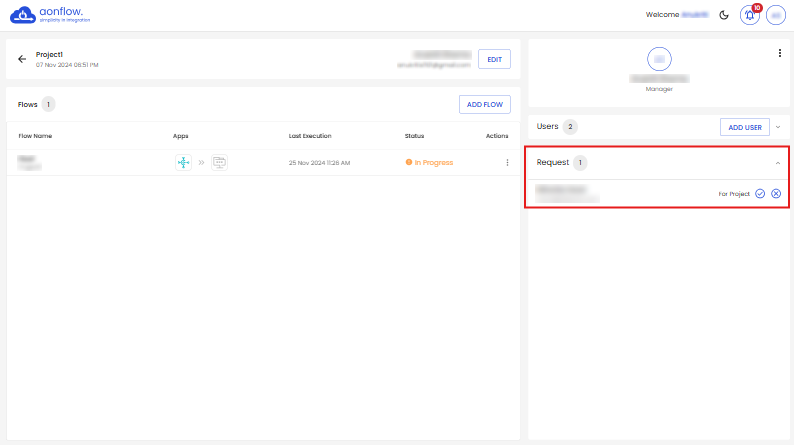
You can see that only 1 request is pending now.
Got a question? Contact Support
FREE DEMO
Don't miss out! Schedule your free demo today.
Our experts will analyze your iPaaS requirements, not just show you the product.
Book a Demo